Installing Internal USB Sockets
Caution - not for those of a nervous disposition!
Shortly after I got my Eee, I bought a Logitech VX Nano mouse which is a most amazing mouse for a small laptop's use, since it's very small itself. It also has a tiny receiver that only sticks out about 5mm from the side of the laptop.
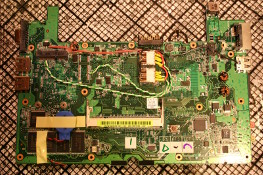
Anyway, I decided that given it's such a small laptop, 5mm was just too much - so I fancied mounting the receiver inside. I'd seen a few mods on EeeUser, so thought I'd give it a go myself.
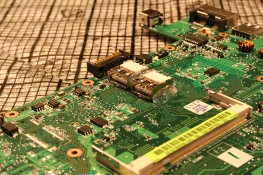
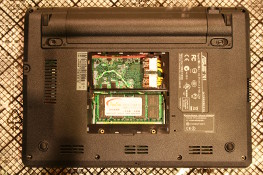
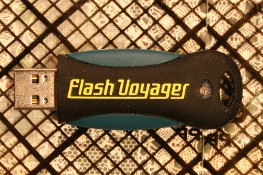
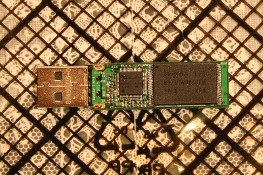
Since there is space for two USB sockets in the PCIe space (mine doesn't have the connector fitted anyway), I "needed" something to fill the other socket. My choice was a 16GByte USB flash stick (Corsair Flash Voyager).
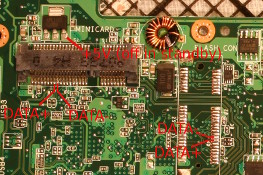
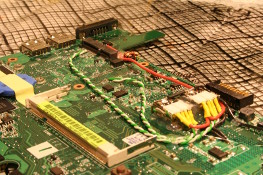
This modification uses the USB signals that are part of the Mini PCIe connector. Obviously, with the "FLASH_CON" connector not fitted, these ones are free. Also, the WiFi card fitted to the Eee 4G uses PCIe only, so the USB port on that connector is free too.
So here's how I did it - see how to dismantle the Eee first and then read on ...
Tools required
- No.1 Philips screwdriver (not pozidrive)
- Anti-static wrist band
- Small flat screwdriver
- Fine tipped soldering iron (0.5mm)
- 30awg solder
- Liquid flux
- 30awg wire (green and white) for USB signals
- 24awg / 26awg wire (red and black) for USB power
- Wire strippers
- Tweezers
- Hot glue gun (with glue)
- Magnifying glass
Preparation
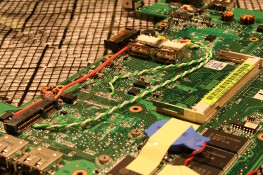
I've seen a few sets of photos of this modification, however none of them appear to twist the wires together. The USB data signals form a differential pair which is intended to be twisted together as a pair if it's not in a controlled impedance like a PCB. This twisting cancels out any noise induced in the pair. So, twist some lengths of green and white together, then strip and tin the ends of them.
Note that the signal wire I used at this time was just telephone wire and in my opinion too thick. Also, being PVC insulation, was too easy to melt. I highly recommend using PTFE insulated wire as it won't melt and shrink when you solder the wires. I later replaced the wires though, when my 30awg PTFE wire arrived :-)
USB Pin-out
Here is some vital pin-out information before you start. The VCC and GND are taken from other points: The VCC is disabled in standby if you use the one shown in step 2. GND can be picked up from many places on the top surface of the PCB.
| USB Pin | Signal name | Mini PCIe Pin | Wire colour |
|---|---|---|---|
| 1 | VCC (+5V) | - | Red |
| 2 | DATA - | 36 | White |
| 3 | DATA + | 38 | Green |
| 4 | GND | - | Black |
Unfortunately after this was completed, I discovered that the USB port on the WiFi connector was actually faulty. So, the best option was to fit an internal USB 2.0 hub.


Computing Power
- Acer Aspire R3700
- Acknowledgements
- BOINC
- Desktop PC
- Eee PC 4G (701)
- Eee PC 901
- Gigabit Network
- Inspiron 14 5485 Laptop
- Kids PC 1
- Kids PC 2
- Media PC
- Mini-ITX PC
- My Useful Scripts
- Nano ITX PC
- Nook Simple Touch
- Processing Power
- Raspberry Pi *
- Sharp Zaurus SL-C3200
- Storage Capacity
- The Server *
- What Is Firmware


![Validate my Atom 1.0 feed [Valid Atom 1.0]](./images/valids/valid-atom10-yellow.gif)
![Validate my RSS 2.0 feed [Valid RSS 2.0]](./images/valids/valid-rss20-yellow.gif)